A stop motion puppets head must be light so that it doesn’t collapse on the character armature, but it must also have the ability to emote the characters feelings and lip sync any dialogue needed. In the current animation industry, 3D printing is being used to create replacement faces that allow the animator to quickly and accurately animate a characters facial movements. Creating replacement faces is a whole different project to this (a project I’ve actually already done in my second blog… http://gracediggensprototyping.wordpress.com/) so instead I decided to model my characters head in the traditional stop motion manor – with plasticine. By using plasticine, I would be able to animate the characters face completely as well as having the freedom to model it exactly how I wanted.
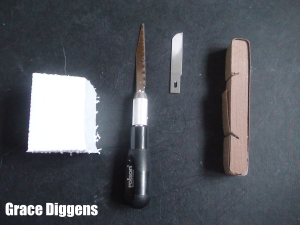
To keep the weight light, I cut up a small piece of polystyrene and shaped it to the right shape using my character plan as a reference. These are the tools I used and the starting off shape of the ball. I cut it down, and sanded it until it was completely smooth. I didn’t have to add any detail into the polystyrene because I would be doing that later in plasticine.
The bulk of the head was made completely in plasticine apart from the characters eyes. To make his eyes, I used two small white beads. For the iris and pupil of each of the eyes, I used a large drill piece and counter sunk one of the holes in the beads. This gave me a perfect circle that I could then add the iris colour detail and eventually the pupil once everything was dry. A bead is perfect for a stop motion puppets eye as if already comes with a tiny hole in the middle of it. A tiny tool like a pin can then be used to put into the hole and then animate the beads movements without having to try and grab the bead with chunky fingers and ruining the face around it. The best thing about this technique is that because the hole in the bead is so small, providing you are clever with your camera angles, the hole can’t even be seen in the final animation!
The rest of the process of making the characters head was simply to model it. I really enjoy modelling so this wasn’t too tricky for me (although I’d like to work a little more on his lips) – I used my character maquette to look back at to make sure I was getting everything in the right place and the correct size.

